return to first page
![]()
Nixnie - 3
Ted Polet
18 - scenic detail
Having done some detail work on the layout, I decided to add more photos to this subject. I spent a few evenings painting figures and whitemetal castings. This morning I made a few photos which naturally reveal a number of things still to be put to rights. Anyway I won't hide that from you. Here goes.
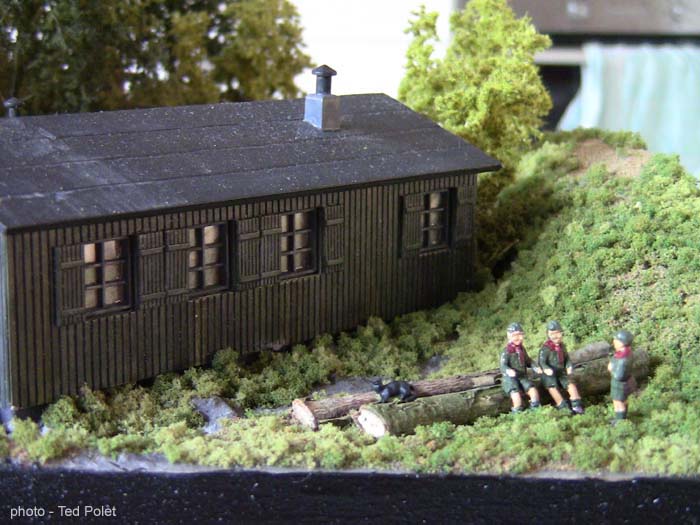
I made a small 'cameo' scene featuring three boy scouts, a cat and two tree trunks, but I managed to overlook the fact there should be bushes hiding the lower edge of the cabin.
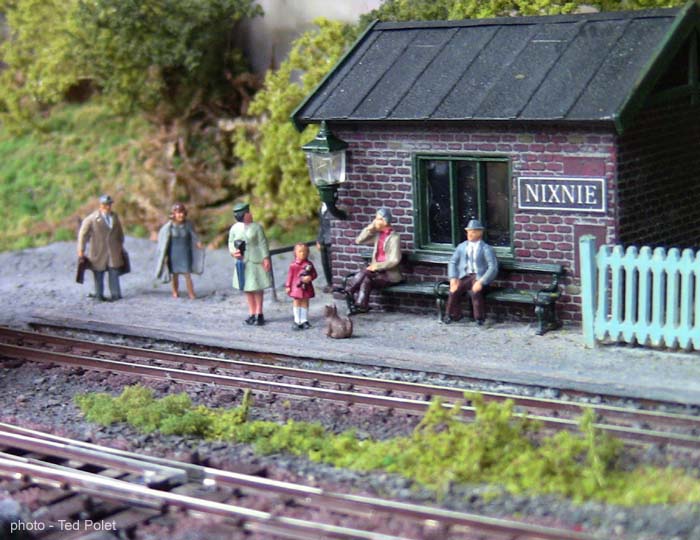
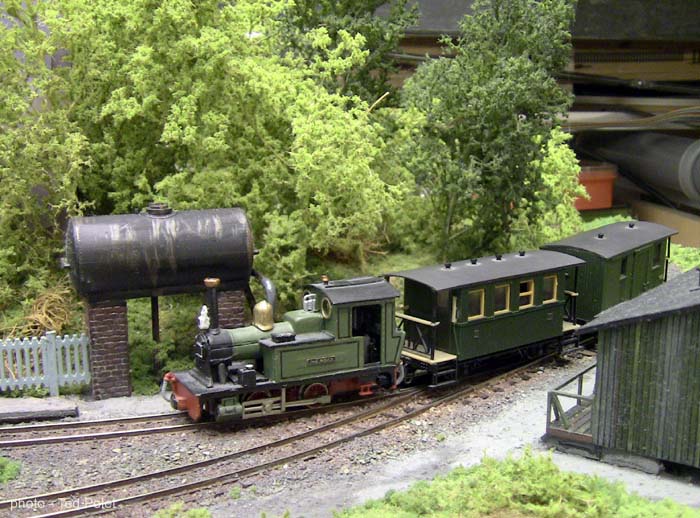
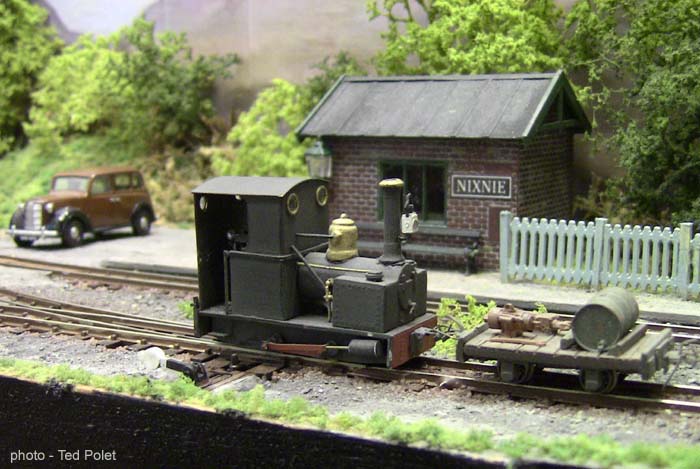
Next, some views of the tiny station which now features some prospective passengers. Evidently there is more traffic than one would expect on such a sleepy line. Must be a bank holiday! By the way, the lady in green, next to the little girl, was painted by Reinier Hendriksen.
The train staff on this short train of Egger and Minitrains stock is pre-painted Preiser. These are small enough to fit in the tiny stock as opposed to the Roco H0 figures used elsewhere. The cyclist is a very primitive plastic figure of uncertain parentage which I painted with some camouflage work. Its pose is very natural though.
Some detail round the 'goods shed'. There are two ancient Preiser figures carrying loads, which I repainted as their overalls were in garish red and blue. There is a cat chasing the pigeons in the foreground, but this doesn't come out very well in the photos. The boxes next to the shed need to be painted better as there is still some plastic sheen on them.
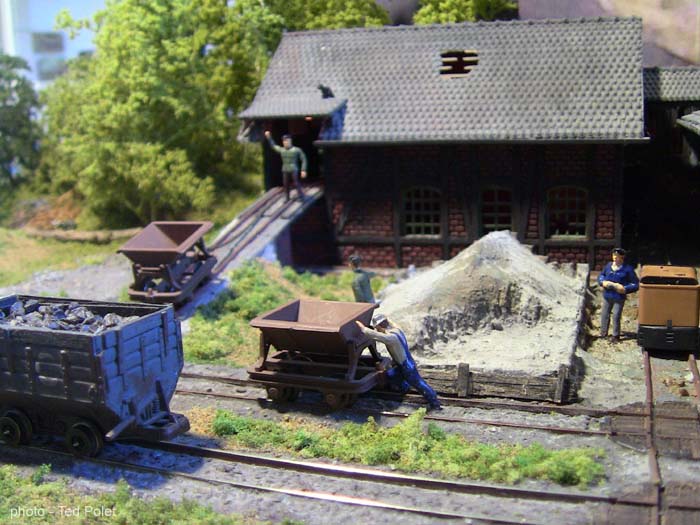
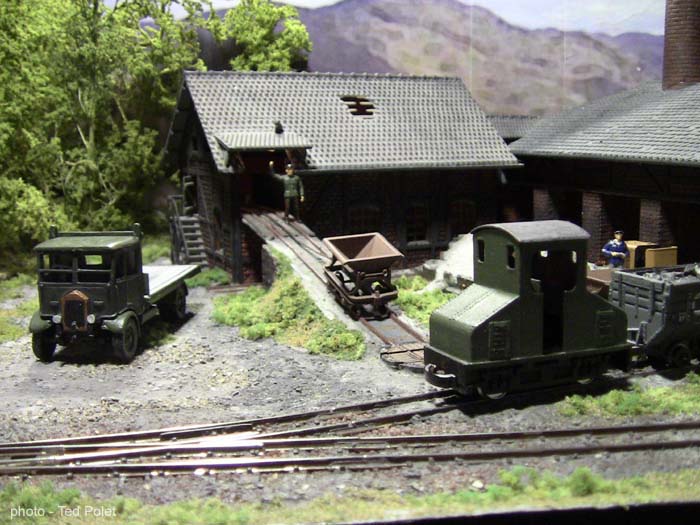
An overview of the brickworks showing a lot of activity. There is a tiny Gmeinder diesel and driver next to the kiln building, a skip is being lowered from the ramp - there is a chain and hook which it is attached to, and the man on the ramp is signalling to the winch operator. There is more detail there which I will show later.
Some wildlife can be found if you look for it. A night animal, I know, but this one ventures out under cover of the tree trunk and the bushes.
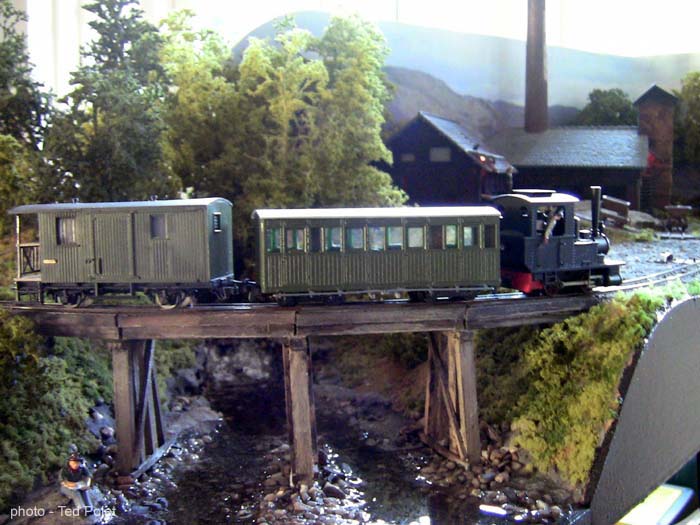
A view of the river bridge, with someone sitting on the bank sketching the picturesque view down the river. He must be oblivious to the short train passing overhead!
A photo of the almost completed layout with its light fixtures fitted, as would be showing it in a very dark hall at Rijswijk. I used two telescopic photo light stands and a lightweight ply frame to clamp two spotlights on. These are fitted with LED lamps giving a huge amount of light:
The boy scouts at the cabin, with an overnight growth of shrub at its base!
The battery loco shunting a short train of end board platform stock into the siding:
A better photo of the cat chasing the pigeons:
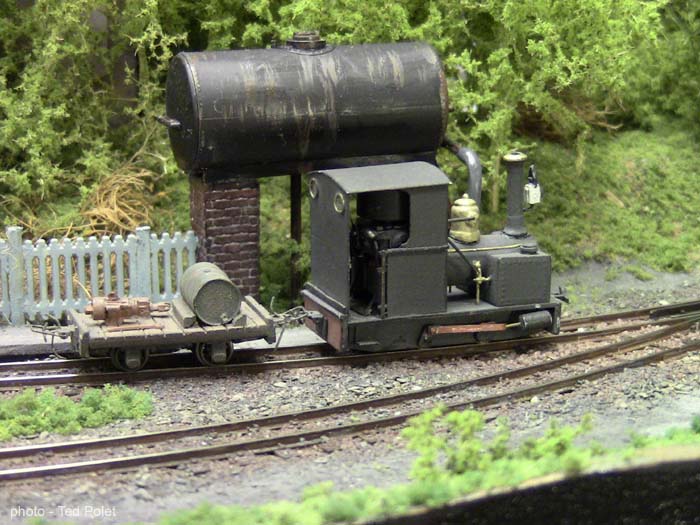
Scrap at the end of the brickworks siding. The wagon is a whitemetal casting on an Egger chassis.
A skip being pushed to the wagon turntable. It should really be loaded with clay.
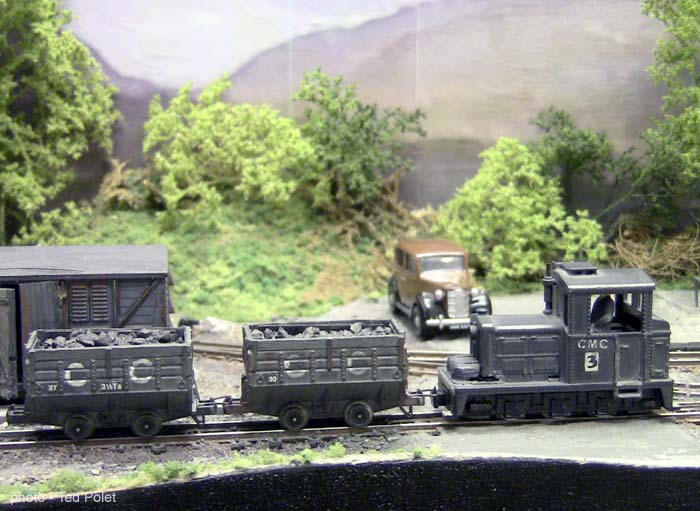
The Jeanette shunting a coal wagon on to the brickworks siding.
A backlighted shot of the Minitrains Egger replica, with a Parkside Dundas DM61 carriage and an Egger van, crossing the river bridge.
Over the weekend before the show I completed an EAMES whitemetal 1934 Albion 2-ton flatbed lorry.
Some final notes:
I had a lot of trouble with the scale of the figures, as I want to run the big C&DR stock on the layout as well as these tiny H0e models. So I had to compromise. I hope they won't look too much out of scale. The figure in the Minitrains "Koppel" steam loco looks very miniscule in the photo. As it is I had great difficulty in inserting a mutilated Preiser figure in the Egger replica (which everyone persists in naming a 'Koppel' although it doesn't look like an O&K at all!).
The Albion is a 35 year old kit that I picked up at the 009 Society second hand sales stand a number of years ago. It needed a bit of fettling, but everything went together without too much of a fuss. It should really be loaded up with bricks, but there was no time before the first show to do so. It is a nice 1930s vehicle that might have been around still in post-war years. I like the flat cab and the radiator flanked by two headlights. There was a choice in the kit to build it like a box van, but that would have been inappropriate for the scene as well as far too big. If the battery electric seems to tower over it, that's perspective, as in fact it doesn't - it's only slightly taller.
19 - Nixnie on Youtube
I published a short video on youtube (12 minutes) of Nixnie, showing various trains running and a number of shunting moves. Right at the start you will see Reinier Hendriksen's Bagnall at work. Note this video doesn't show any C&DR stock, some of which can and will run on the little layout. All that is shown is the stock that features in the last page of this series.
Video:
The slow running in the video is due to the KPC controller I use. These are no longer available although there has been talk of a re-issue from time to time. I have two of them, both of the switchable feedback type. It is possible to adapt the amount of feedback control to the motor type in your loco. Some require a bigger kick to keep ticking over than others. Modern Japanese motors usually require less feedback than a Fleischmann 3-pole job. Some tiny motors like the ones in the Caramel chassis won't even be quite happy with the reduced feedback setting which is evident in the stuttering stop of the Mack truck conversion which uses a Caramel.
Finally, Nixnie has been shown at the Expo Rijswijk model railway show on 19/20 January, 2013, and to all accounts it was a success.
20 - engines and rolling stock for Nixnie
With an exhibition coming up for Nixnie in January 2013, it was about time to get a move on doing something about rolling stock. The rolling stock for Nixnie has two faces. I do run some of the smaller C&DR stock on the layout, but in recent years I have accumulated some small size 009 and H0e stock which is more appropriate for the small layout.
The Minitrains locomotives
The most recent additions are from the Minitrains range. The main reason I have bought some Minitrains stock is sentimental, as it reminds me of the 1960s when I started modelling. My experiences with the new Minitrains stock are mixed. The Egger no.2 replica runs like a treat, very smooth and quiet despite being rod coupled. It has a flywheel that regrettably fills the cab but keeps it going almost everywhere, and it looks excellent at the head of a train of Egger coaches.
The Baldwin has been a source of trouble all along. It has a good motor and chassis, but no amount of tweaking the quartering makes it run smoothly. It came with a cut down gear on the first axle that hit the intermediate gearing to the motor, making the loco limp along the track. I wonder why they didn't make it gear coupled anyway. I removed the burrs from the cut down gear and it ran a little better. It still has a few binding points in the rod coupling that won't go away. I think the crankpin positions are inaccurate. I tried tightening up the loose bearing journals inserting brass shim, but that succeeded only in locking up the chassis as the binding was accentuated, so I removed the shims. I can now run it by setting the KPC controller to full feedback, as this boosts the motor over the binding points. It runs reasonably well now and it keeps running for ages. But not having solved the problem irks me no end.
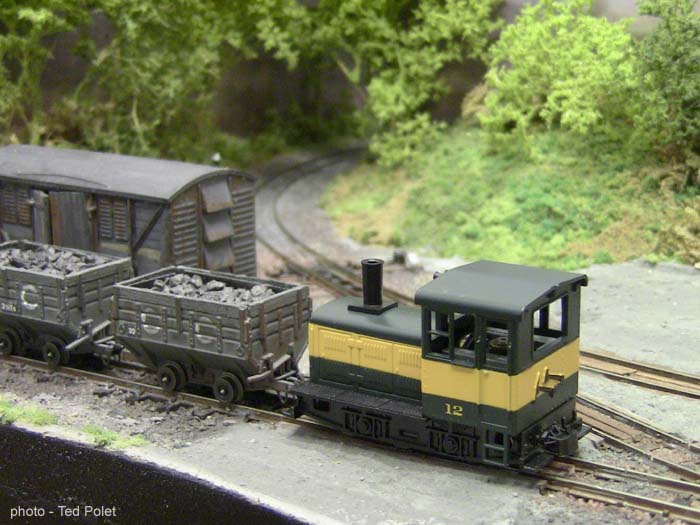
The last item I obtained is a Plymouth diesel in the 1960s livery of dark green with a yellow band. This didn't run as well as I had hoped as it proved to tilt fore and aft alarmingly. On investigation this proved to be due to the chassis construction which has two brass beams slotting into the chassis block. The bearing beams of the Plymouth proved to have some play so the loco tilted with the action of the drive gearing.
I reduced the movement in the Plymouth chassis by inserting a strip of brass shim between the beams and the rectangular support block protruding from the chassis. One is visible in the close-up. In addition I had to solder a tiny pickup wire to improve current collection from the front axle stud. The result is that running has improved hugely. I also took advantage of the body shell being off to blank off the LED under the cab roof with black paint so it only shines forward!
Improvements to the Egger coaches
Another little project was improving the three Egger carriages I have for the layout. The idea was to run a 1960s style Egger train, using the Minitrains replica Egger no. 2 loco and original carriages. The two-wheel bogies of the Egger stock cause many problems when running on non-Egger track. I tried gluing the bogies to the vehicle floor which improved things somewhat. However, the long wheelbase and the square flange profile means they tended to climb the track and the fixed couplings (early Egger type) locked up too easily so they derailed the vehicle on my sharp curves. So I found a solution that both improves running and reduces the long wheelbase look.
I cut the couplings off the bogies and cut the pivot stud off the carriage floor, then move the wheelsets inboard so the brake hanger lines up with the inboard end of the steps. I fitted the couplings on a 0.5mm strip of styrene which is then pivoted from the original bogie pivot, using the plastic pivot pin. The photo below shows the changes made. Note that the floor is rather cluttered with glue spots due to the earlier work. The Egger plastic doesn't take kindly to polystyrene cement, so I turned to cyanoacrylate gel.
The 0.5mm strip can just move sideways under the bogie subframe if this is glued on two strips of styrene glued to the floor next to the solebars. The plastic pivot pin needs to be given a little space so I drilled a second hole in the floor in the spot the bogie pivot ends up. The coupling stub is given a slightly flat top edge, then is glued against a small block of styrene glued to the coupling strip, again using cyano gel. If one supports the coupling with a sliver of 1mm styrene between it and the buffer beam, it sets just right. The wheels are still the original ones. The flanges have worn a little due to the long wheelbase having ground through the curves countless times. Having them closer together means the angle to the track is less acute. They track much better now. Using an engine, I pushed the two carriages converted up to now through the curves on Rae Bridge for some time, and they stay on without any problem.
The brake van has been adapted, note the shorter wheelbase and overall better look compared to the coach.
The vehicle ends before and after modification.
Next, various views of the H0e locos and stock, showing how their tiny size is appropriate for the little layout.
The Egger replica with coaches.
The Plymouth diesel shunting at the brickworks.
The Baldwin saddle tank with a short coal train and a Minitrains 'brake van'. Note I did some photoshopping of the trees on the left - there was a bit of C&DR in the way!
A Peco 'Jeanette' on a Fleischmann chassis. In this view the loco is still unfinished - I had to camouflage that awful seam in the boiler and smokebox. A blower pipe has been added since.
I got this loco from Klaus Olschewski in Germany. It is an Egger/Jouef 'works locomotive' with the front end of a Matchbox Caterpillar 'Case' tractor added. It is a good runner into the bargain, shown here with a few Roco skips.
The next loco started as a 1970s Atlas model, a precursor of the Roco range. I rebuilt it with a shorter hood long ago, and fitted an excuse for a gearbox in front of the radiator. It was refitted with a 5 pole motor and despite the slightly wobbly wheels it is a fair runner.
A tiny electric loco
An unusual model is a little steeple cab electric by Tebee Models, a 3D printed body on a Bandai chassis. I fitted styrene strips inside the body that fix it to the clips on the Bandai chassis. Also, I glued the Bandai ballast blocks into the hoods. It has entered service as a battery loco due to the absence of overhead wiring, but I'm thinking of making up an extra roof with a pantograph for service on the C&DR in the future.
There is a little roughness left on the 3D printed surface, but the paint has sunk into it and evened out most of it. I don't have a glassfibre pencil to do some preliminary polishing, but it doesn't look too bad now. The acrylic paint mixed a little with the rust brown water-based paint it was delivered with, but this makes for an interesting weathering effect, particularly on the roof.
What I missed on the tiny hoods was ventilation grilles. I made up a few from paper which initially I wasn't quite satisfied with as they looked too much like paper. The buffer beams have been extended downward with a strip of styrene, and I fitted some whitemetal coupling/buffer bars to it. All was done with cyano gel glue.
The cab interior: a controller wheel and a brake handle.
Reinier Hendriksen's little Bagnall
Continuing the tale of the rolling stock for Nixnie, here are a few photos of a model scratchbuilt by my friend the late Reinier Hendriksen, over 15 years ago. It is a tiny Bagnall wing tank, made from brass on a Saltford models chassis. It is of split frame and axle construction, with tiny cranks and coupling rods, driven on the rear axle by a Mashima 16x9 open frame motor in the cab. It runs very smoothly although it has a slight limp due to wobbly wheels.
I intend to run this loco sparingly as I don't want to cause any wear.
Some of the old hands in 009, who remember Reinier's Moors End layout, may recognise it!
The wagon, also by Reinier, is a scratchbuilt affair with 5.5mm curly spoke wheels.
A close-up of the chassis which may shed some light on its construction and origins.
A bogie carriage
Meanwhile there were two Parkside Dundas Ffestiniog kits staring me in the face. One was the DM61, a short freelance four compartment bogie coach based on third/brake carriage no. 10 of the FR. This kit together with the third brake (DM59) had originally been given to my son by Mick Thornton at a time he showed some interest in 009 modelling. Alas, nothing came of it so the kits lay idle for years. I had only one set of couplings left, so I thought I'd start the DM61. This had been the victim of an earlier attempt because the windows were glued shut with a single sheet of clear plastic instead of setting the windows in flush as intended. So I had to camouflage this bodged attempt and managed to make up the body and interior partitions and seats. I made it up without end platforms - the loop at Nixnie is short enough as it is.
First shot of the assembled body, showing the window sheets stuck haphazardly inside the body. Luckily on the outside it doesn't look too bad.
The bogie coach on its wheels but not yet completed, showing how tiny this carriage is compared to the 3.5mm scale Egger stock. The second one still has to be completed...
The freelance vehicle completed. Although it is a very nice kit, it is very fiddly with the window bars and the separate brake blocks. One of these managed to escape and won't be found again!
I sweated over it and skipped the handrails next to the doors. I don't have a 0.5mm drill anyway. Weak, weak, I know, but eyes watering and hands shaking I'm glad I managed to complete it as it is. It makes a nice companion to Reinier's little Bagnall, as can be seen in the photos.
More photos (1)
More photos (2)
return to first page


![]()